
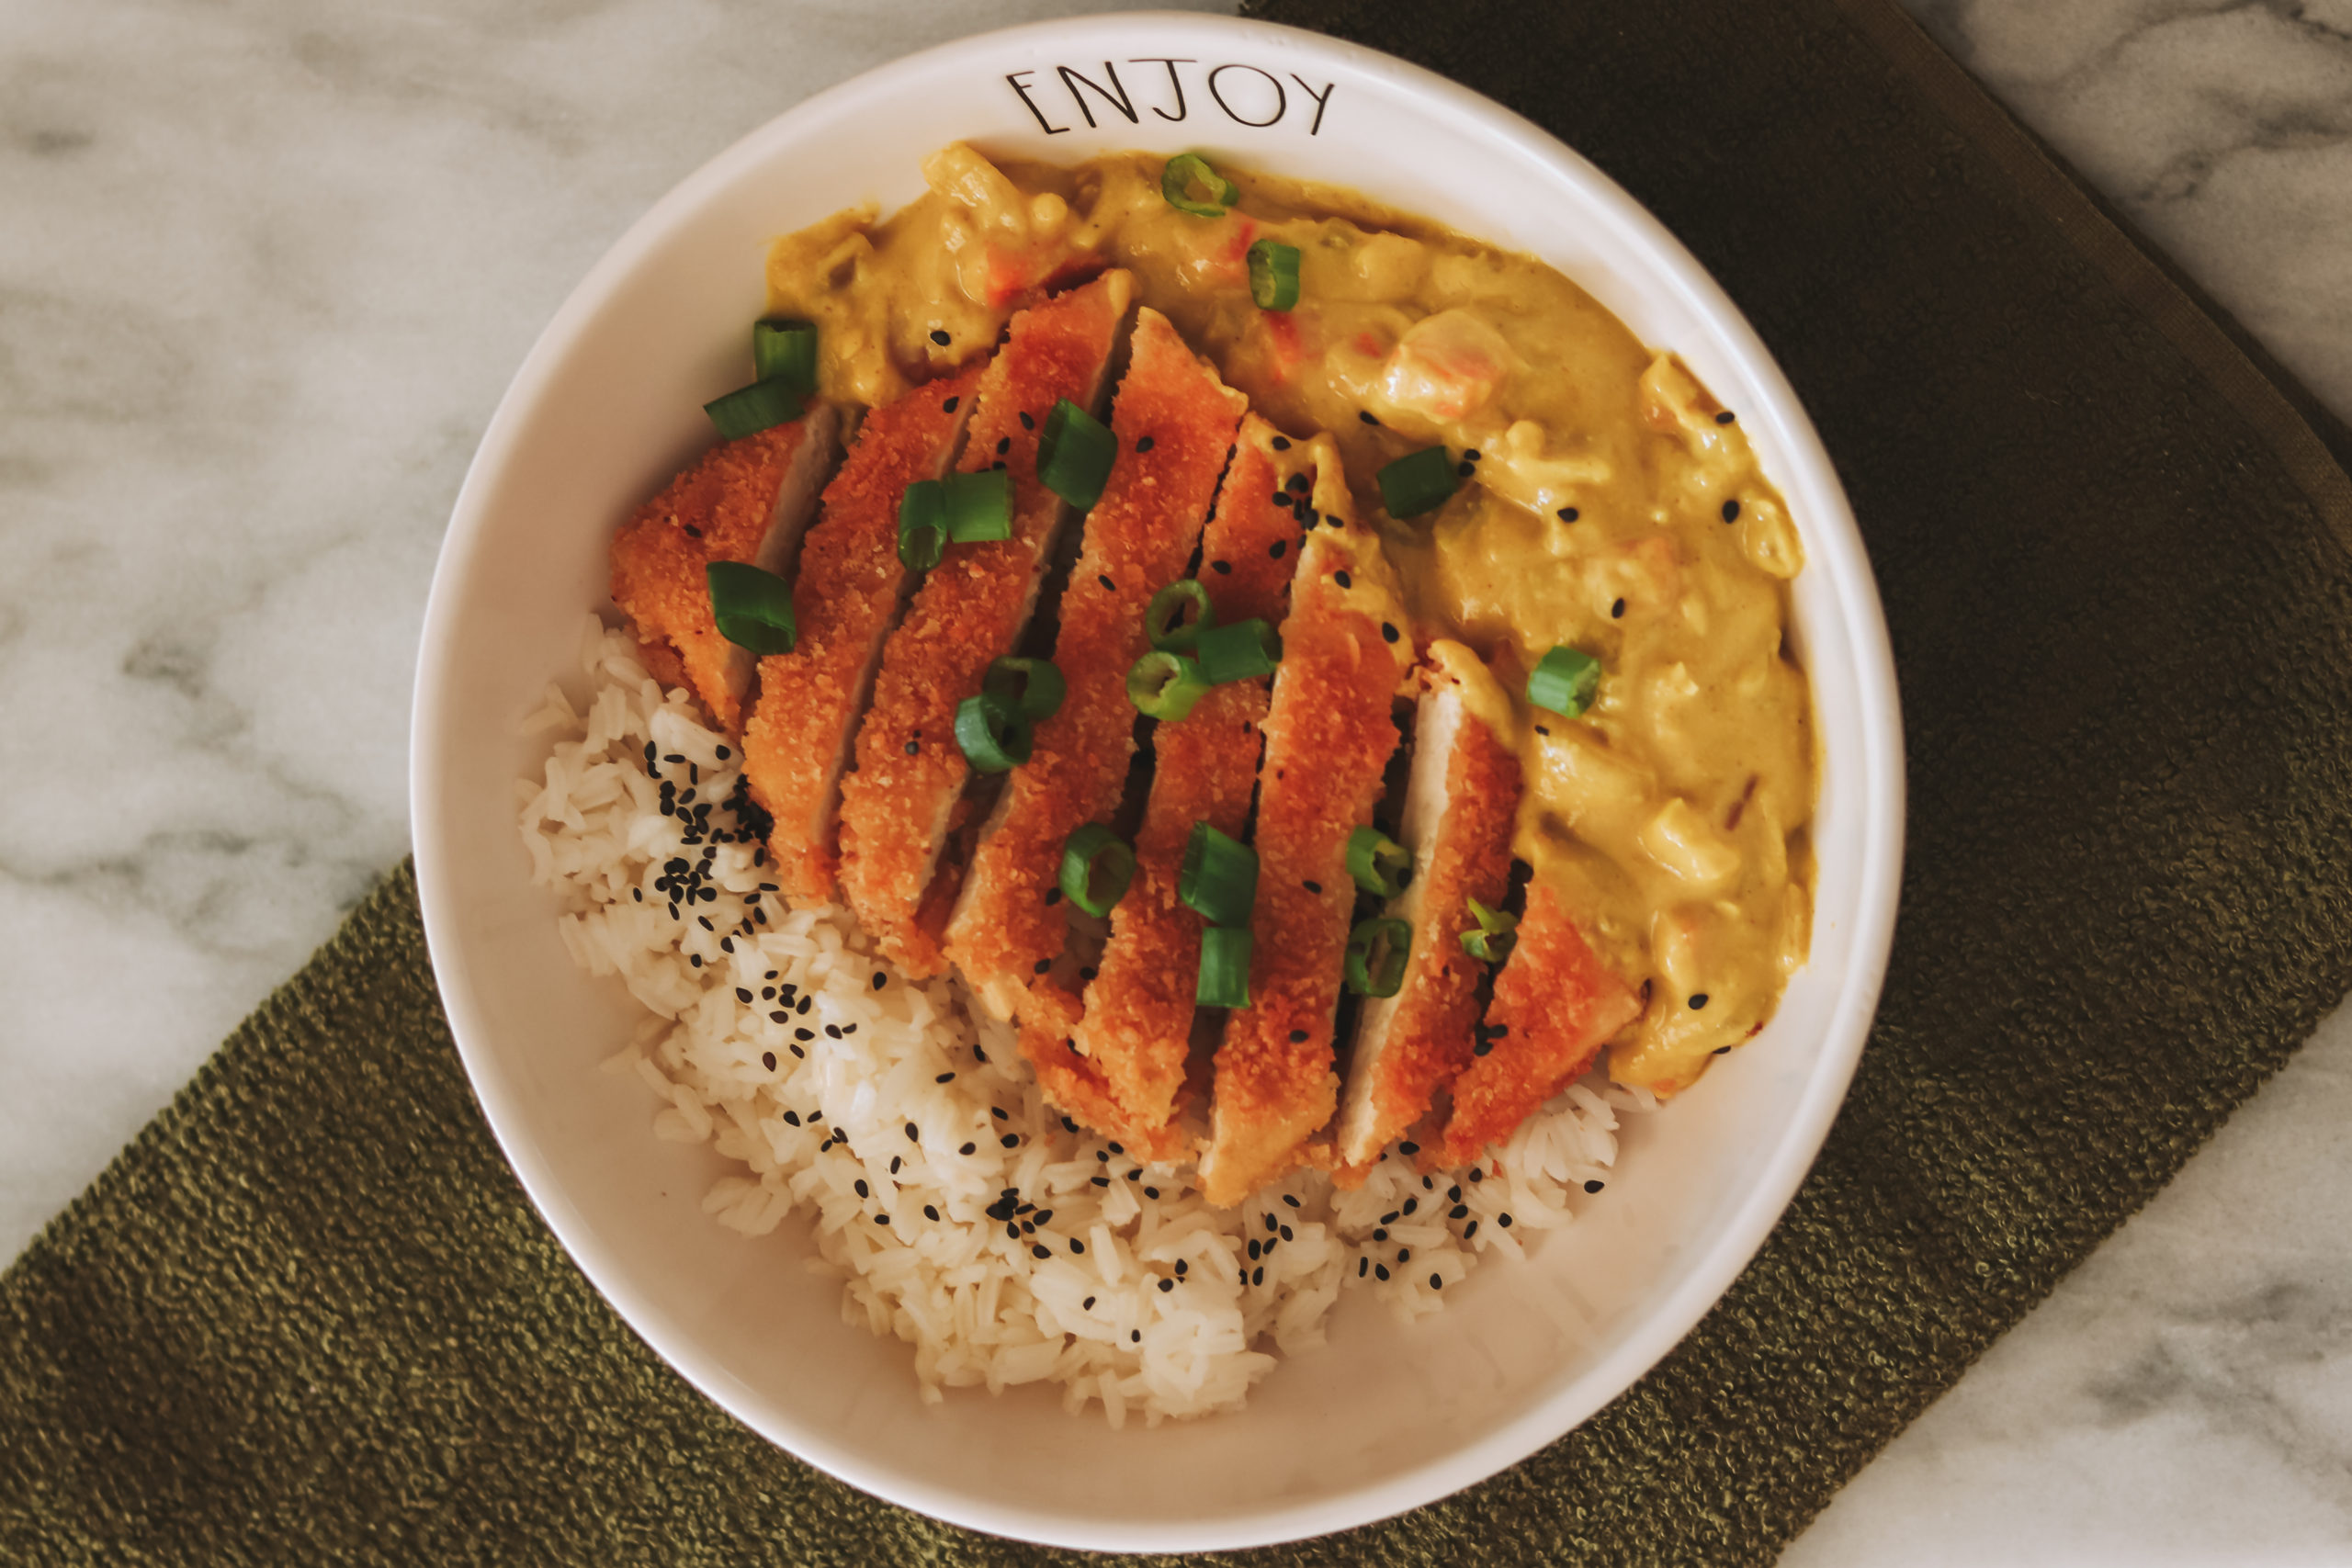
Japanese-style Crispy Tofu Katsu served with a hearty veggie curry sauce, over a bed of rice and topped with scallions & sesame seeds.
Vegan | with Gluten & Soy Alternatives

I have been wanting to prepare this recipe for such a long time!
If you want to know a different way to prepare tofu than how you usually do, this is your lucky day because today on VeggieJeva, you’ll learn how to prepare Japanese-style Tofu Katsu and a delicious curry sauce on the side.


What is Katsu?
Katsu カツ is a Japanese word that means: cutlet. Traditionally, this style of cooking consists of breaded, deep-fried pork or chicken cutlet. It’s almost always accompanied by a sauce like teriyaki, yakisoba, or curry, which enhances the flavors of the dish.

Veganizing it
This recipe is surprisingly simple to veganize. You can achieve it by switching the traditional meat for tofu, choosing vegan-friendly panko, and leaving the eggs out of the batter. Everything else is vegan, including the curry sauce, which we’re going to make with onions, carrots, garlic & coconut cream.

The Dish
I love this recipe because it gives the tofu a whole different way to enjoy it! Ingredients such as panko, keep this dish authentic since it’s a type of Japanese breading. This helps give the tofu a very unique and tasty texture.
Along with the tofu katsu, we’re making a hearty veggie curry sauce, that’s going to help elevate the flavors of the tofu. Serve on of a bed of rice, and top with sesame seeds & scallions. I’m sure you will enjoy it!
Gluten-free & Soy-free alternatives have been included in the recipe notes.


3 Ways to Cook the Tofu Katsu
The recipe is written using the frying method, but that may not be the preferred choice for everyone. You can also bake it, but keep in mind that it’ll take a bit longer. The air-frying method is the one that uses less oil; you can choose to not use any oil at all, but the end result won’t be as crispy.
Below are the instructions for each method:
- Fried: for this recipe, I did a shallow pan-fry. Although not the healthiest option, it’s the option that gives you the crispiest results. You’ll find the method written into the recipe.
- Baked: Pre-heat oven to 425°F (220°C). Place battered cutlets on a greased baking sheet pan. Bake for about 25-30 minutes or until golden brown; flip halfway through. When ready, remove from the oven and, if desired, sprinkle some salt on each.
- Air fried: Set the air-fryer to 390°F (200°C). Lightly grease the inner basket with oil, place the battered tofu, and cook for about 20 minutes or until crispy.
Tofu: Curry Sauce: Serving: Tofu: Curry Sauce: Serve:
Ingredients
Procedure
Notes


Did you make this recipe? I would love to know how it turned out for you! Tag me in your Instagram creations for a chance to be featured in my insta stories! Use @veggiejeva and the hashtag #veggiejevaskitchen.
When you leave feedback it helps me improve and grow, leave me a comment below!
If you have Pinterest, you can find me here and Pin the following picture, if you like!

All images & content are protected. Please do not use my images or content prior to permission. If you want to republish this blog post, please link back to this post. Thank you for supporting VeggieJeva!
Disclosure: This post may contain affiliate links, which means that I may make a small commission if you decide to purchase something through one of my links. It’s important to mention that I will never recommend anything that I don’t use myself or strongly believe in. Don’t worry, you get the same price! This will help pay for web hosting, email delivery, domain registration, and other various fees that help keep VeggieJeva operational. I appreciate your support!

